
I’m so excited to share with you my 2nd natural dyeing tutorial. This is definitely one of my favorites because there is no heat required for setting the dye. It’s basically a set it and forget it kind of dye project! The only time you need to heat up the yarn is when you’re adding mordant to it. I hope you enjoy this fun dyeing method!
Materials
- 1 bag of dry black beans, mine was 16 oz.
- Large bowl or jar, I used a gallon sized mason jar. Any large container would work fine. As long as it’s deep enough for yarn to be fully submerged.
- Water
- Large Pot
- Strainer
- Dish towel
- Alum and Cream of Tartar, found in spice section of your local grocery store.
- Natural yarn of choice. I used Knitpicks Stroll Fingering yarn (75% superwash merino wool/25% nylon)

Step 1: Pour the bag of black beans into your large container and add 12 cups of water. Measuring your water isn’t completely necessary, but if you’d like to try and duplicate colorways, then it would be important to do so. Just make sure you add enough water to fully cover the beans and some extra so that your yarn will be able to be fully submerged in the water later on. Keep in mind that the beans will soak up a little of the water, so the water level will go down slightly after we drain the beans out. Let the beans soak for 12-24 hours and every few hours give the beans a stir.

Step 2: While the beans are soaking, prep your yarn. First you want to let your yarn soak in water for at least 30 minutes or until the fibers are fully saturated.

Step 3: Mordant your yarn. Fill your pot with enough water to cover your yarn. Bring the water to a light simmer and add 2 teaspoons each of Alum and Cream of Tartar and mix until dissolved. Add your yarn and let it simmer for an hour to let the mordant adhere to the yarn.
*If you’re using non superwash yarn, be careful not to agitate the yarn too much in the cooking and washing process to avoid felting*

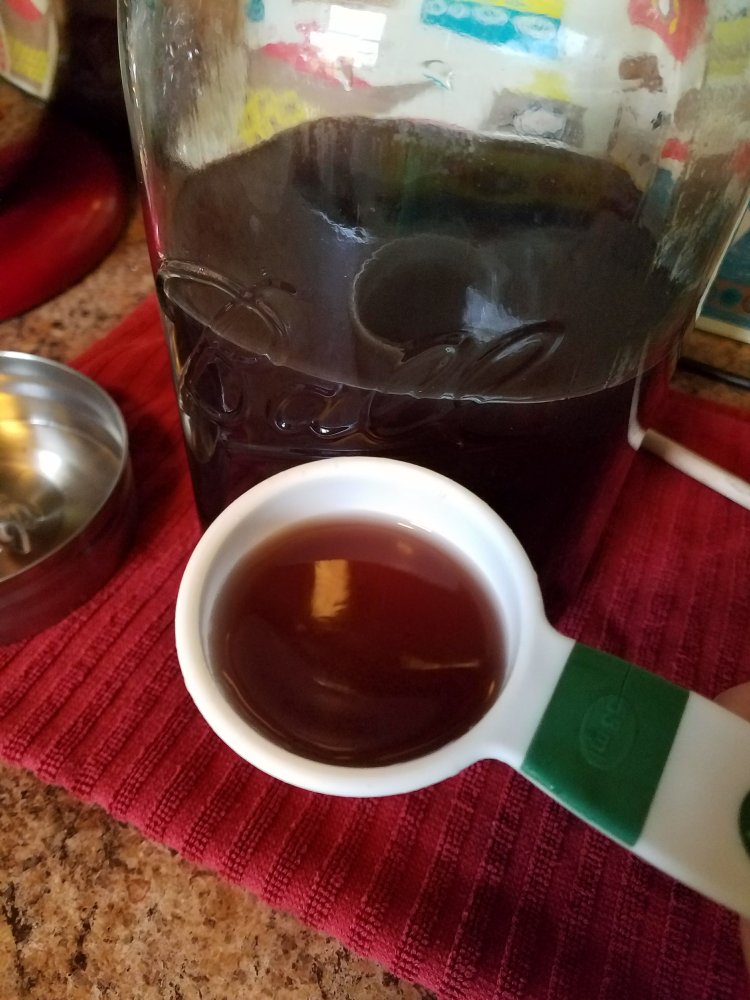
Step 3: Drain the beans out of the water. I like to line a strainer with a dish towel and put it inside a large bowl. You can then pour the dye into the strainer and the towel will catch all the beans and any small particles.

Your dye will be a dark grey color with a hint of red/purple .
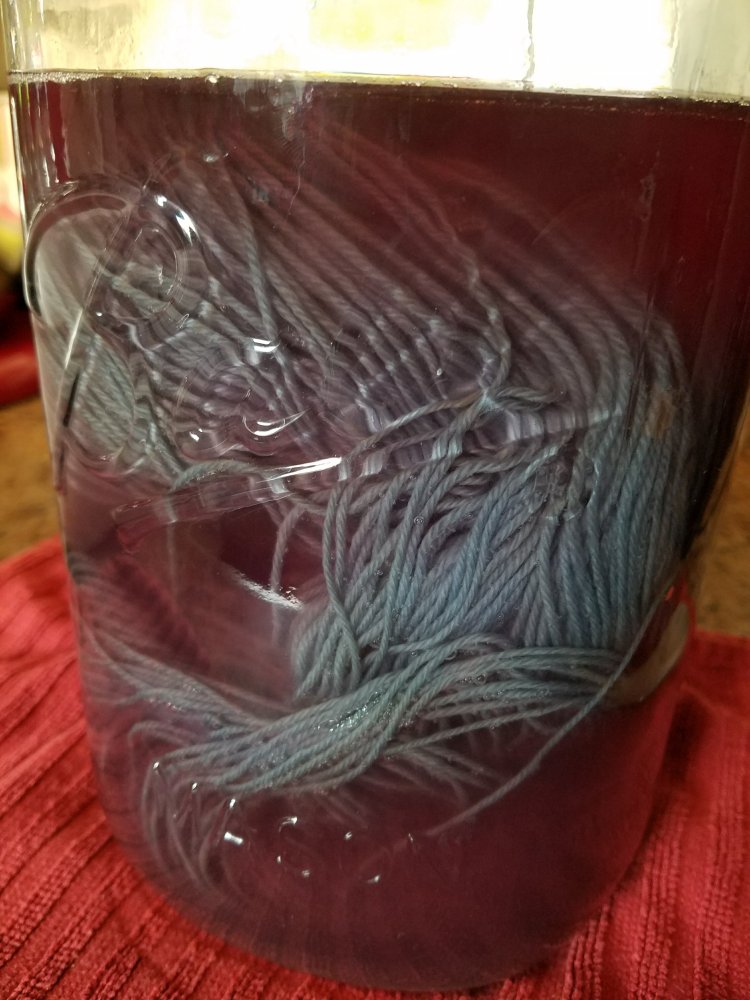
Step 4: Add yarn to black bean dye and let it sit for 12-24 hours. Every few hours I like to stir the yarn around in the dye to make sure the color gets evenly distributed on the yarn.

It won’t look like much when you first add the yarn to the dye bath and you’ll probably think.. how is this going to turn blue? Just wait.. you’ll notice the colors change after it sits for a little while.
Step 5: Wash your yarn with your favorite wool wash or a little bit of dish detergent. Rinse the yarn until the wash water runs clear and then hang to dry! Yarn dries fast outside on a nice sunny day but you can let it dry indoors. I will sometimes put my drying rack in my bath tub and let it dry for 24-48 hours.
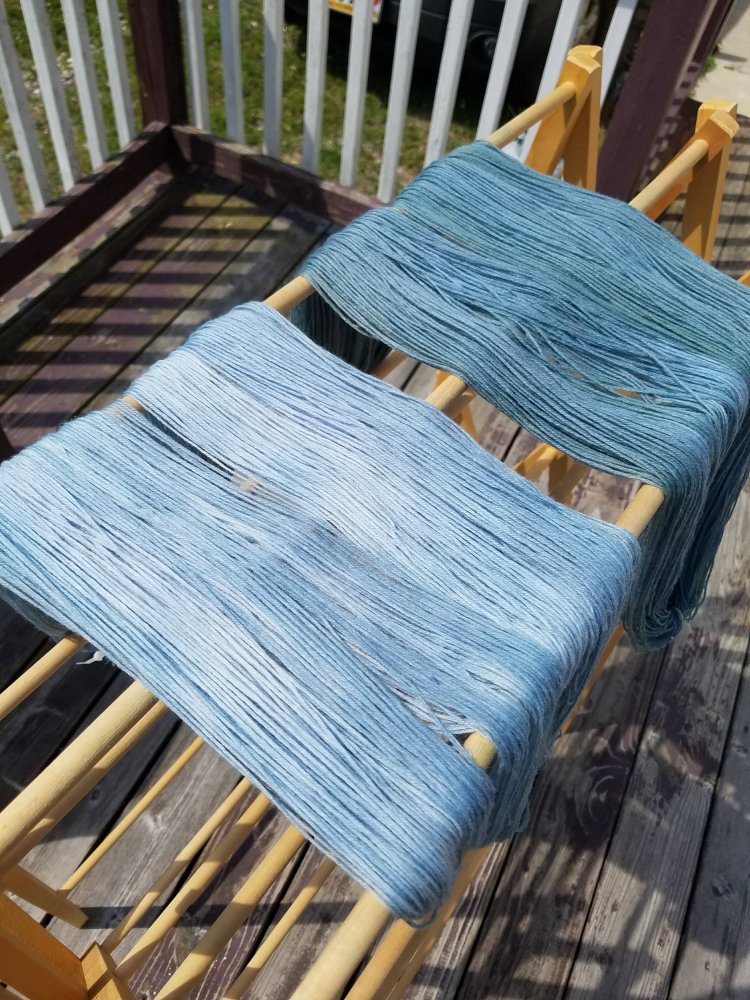
Here are my results from the same dye bath. The first skein I left soaking overnight. When I took it out there was still some color left to the dye bath so I added the 2nd skein. Your results may vary depending on the PH level of your water and the amount of beans and water you use.

If you try out this tutorial, please tag me on IG @wildwooddesignsme. I’d love to see what you come up with!
Please follow my blog via email. You can sign up on the main page and then you can stay up to date with all my new posts! I plan to post many more tutorials and free patterns!

Thank you so much for posting this tutorial 😃 I really want to start dyeing my own yarn with natural colours and this tute is so helpful !!! I’ve had a local cafe save their avocado skins and pits for me so I try that one as well. On that note, do the skins and pits need to be fresh for the dye to work or can they be cleaned and left in the fridge until you need them?
Thanks
Eddie
Insta: mildrednme
LikeLike
You’re very welcome! That’s so awesome you were able to find someone to save you avocado pits and skins! I personally haven’t noticed a difference in the yarn color if the avocados were fresh or not. If you’re not going to use them right away I recommend you freeze them though so they don’t grow mold. Just clean the pits and skins as good as you can to get all the green flesh off first. Let them sit on the counter for a little bit to dry and then freeze them.
LikeLike
Wow, I’ve always been a bit intimidated to dye yarn, but this looks pretty straight forward! Thanks for making the instructions easy to follow, and I can wait to try it for myself 😄
LikeLike
You’re very welcome! This method in particular is very easy! It’s like a set it and forget it kind of thing. Have fun dyeing!
LikeLiked by 1 person
Awesome tutorial and very helpful!! Thank you so much for sharing this with us.💙
LikeLike
You’re very welcome! Can’t wait to see the results of your yarn next time!
LikeLike
I died cotton and it turned grey and not blue. I did not simmer with alum mordant . I let sit in the bean water for several days and used citric acid in one and not another. So is the difference that I didn’t simmer the mordant or different yarn base? When I first pulled it out of the water it had a really nice purple hue then after washing in dish soap it turned grey.
LikeLike
Will this work on fabric?
LikeLike
I’ve personally never tried it on fabric. I know some people dye fabric so I’m sure it can be done
LikeLike
I think it depends on what the fabric is made from. If its an animal fiber like wool, you will get similar results to dying wool yarn. If cotton you will need to use a mordant that works with vegetable fibers.
>
LikeLike
Thank you.
LikeLike